Guys and gals! Do you forgive me for hardly writing since those long ago days before Facebook became a publicly traded company? I can honestly say I do have something to show for the efforts away from this corner of the virtual map…and for once it’s something you could actually come visit in real life.
Gosh, that feels kinda nice.
The great news is the Quiver Tree Gallery is finally open, inside the Inner Banks Artisan Center right here in wee Washington, NC. And it’s wild to think this portion of the journey of launching the Quiver Tree Photography business really only came about a couple of months ago. But I suppose that’s a story for another day.
In the meantime, today’s story is supposed to be about the gallery itself. Because I know lots of you have been following the story here and/or on Facebook/Twitter/Instagram and I would love for you to ‘almost’ feel like you’ve been there, since you might not be able to actually come for a visit right now.
It blows my mind to think that perhaps a month and a half ago the Hubs looked me dead in the eyes and said, “I want the gallery to be your baby. I’ll take the pictures, but I want you to plan and decorate the space.”
I probably looked like a deer in headlights, and was pretty afraid of taking on the project. I mean, he takes some sweet pictures – I don’t want to mess up showing them off because I don’t know what I’m doing!
But I decided to be brave and especially to not be afraid of taking risks. And then he seemed a little nervous — and maybe a little sorry he’d suggested that the space be ‘my baby’ — when I told him I thought we should paint the walls with black chalkboard paint. I almost chickened out about six times, but then I created a board on Pinterest and looked at all the places where chalkboard paint was looking awesome on other people’s walls. And I stuck to my guns and said I thought we should go for it.
And I think it worked out.
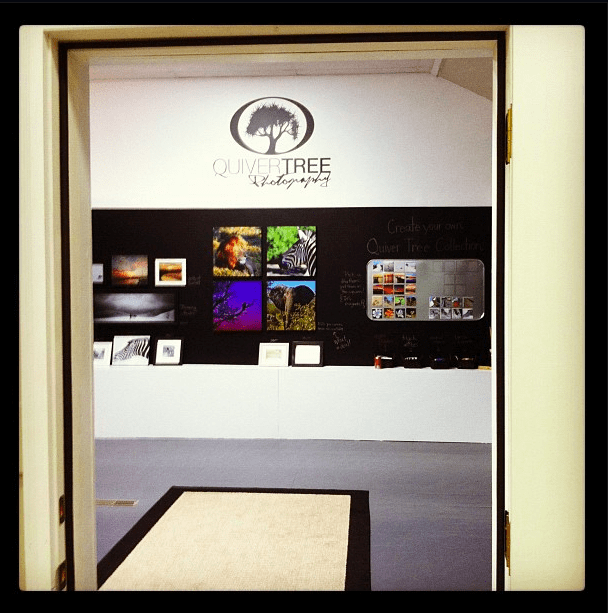
{This is a shot standing at the entrance to the gallery — sorry it’s just via Instagram, I have some better photos below!}
I also decided that instead of just slapping heaps of stuff on the walls, I wanted to arrange the photos in mini-collections and allow a lot of breathing room. And I read a nice tutorial on the Ikea website (I was looking for picture frames and a rug at the time) about grouping photos together in a coherent shape — a rectangle or a square — so that the edges line up and they feel like a unique ‘set.’ And while on the Ikea site I saw another wall painted with chalkboard paint and then I felt like I was totally hip and with it and that I didn’t need to be afraid.
Thanks, Ikea.
And we did that survey to ask you what your favourite photos were, and I was really inspired by the fact that I’d only pulled out a tenth of the Hubs’ best ones, and there was such a wide variety of favourites among them — it wasn’t as if everyone liked the same five photos and the rest were second string. That was encouraging, and I drew a lot of conclusions about that which I plan to talk about in another post.
Thanks again so much to all of you awesome people who participated. Your input was PRICELESS.
Then I had this completely different idea, based on just seeing a pin on Pinterest where someone had used an oil drip tray/pan thingy from the automotive section on a wall for their kids to play with as a magnet board. I thought about how we’d easily be able to create mini-collections for people on photo paper or on canvas, allowing them to choose their favourite photos. But how to show them the plethora of photos they could choose from? A conundrum.
Because clearly, thanks to the survey, no matter which photos I chose to hang, I wasn’t going to hang everybody’s fave.
So I decided to cause myself great grief — I mean, create this really great board where you could play around with pictures that you liked, to see what they might look like in a grouping of four as a square, or as a landscape with three or four pictures side by side. And I cut out a gabillion (okay, sixty) little squares and a bunch of poster board squares and there was some adhesive spraying involved and me on the floor till midnight listening to a great sermon and wondering if the Hubs would ever get home from the gallery (he came in about five hours later…yes, at 5 am) and we ran out of magnets, but it eventually all came together to look like this:
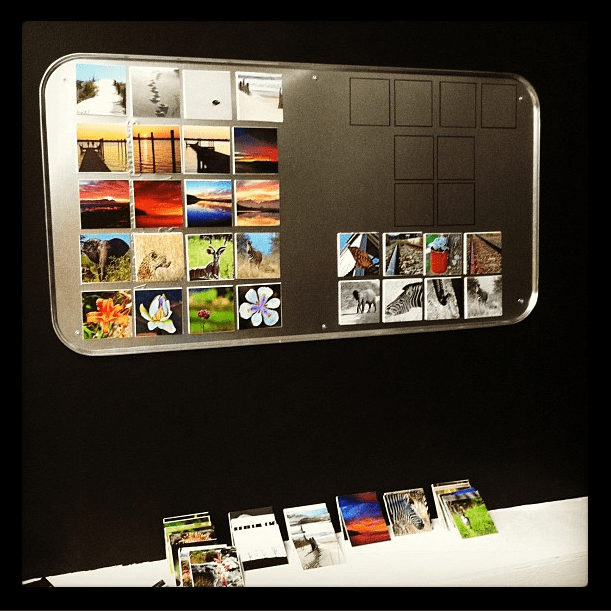
{I later added baskets to hold all those extra photos at the bottom in tidy groups.}
And then everyone commented on how much it looked like an iPhone, which never occurred to me, but I suppose it rather does.
When crunch time came and we weren’t able to slap every stinking photo on the wall that I’d hoped we could, we made the executive decision to let some of the big 20 x 30 canvases stand alone with their bold selves — and you can see those at the end of each side wall, towards the rear wall.
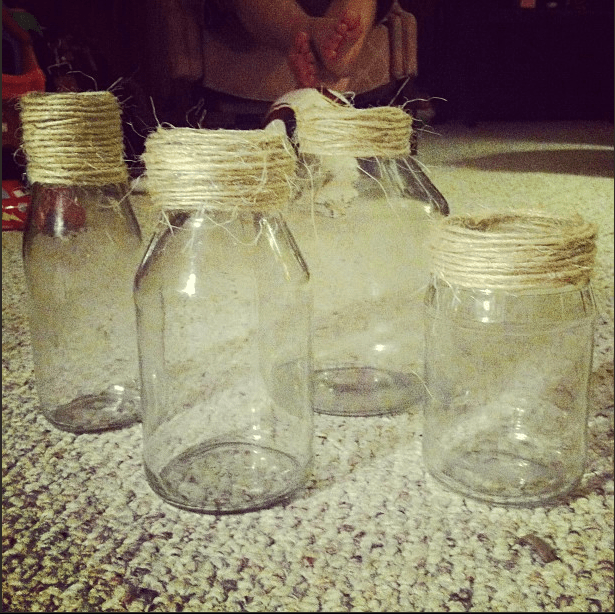
And I wanted to use a lot of book paper to decorate but ending up not getting to execute as much of that as I’d hoped. However, I did save a bunch of jars, remove their goo, and for the first time ever, I used a hot glue gun {it was kind of surreal, I felt like a bunch of women in matching cardigans and headbands and stylish ballet flats should’ve been there to cheer me on} to create these special little ‘vases’.
And then I cut one dead branch and one live branch off the palm tree in our front yard to add some greenery/brownery to the jars so that I could arrange them on top of some nekkid books (thank you, Nester – you inspired a lot of this process for me) to add some interest and texture to the space. I wanted the old books and the leaves we arranged on that bench at the back to have a sort of vintage feel.
And about twenty minutes before the guests arrived — and maybe when some of them had already arrived a little early — I ba-da-bing-ba-da-boom had the pleasure of simply writing titles and descriptions and prices of the photos right there on the wall with chalk. Easy peasy.
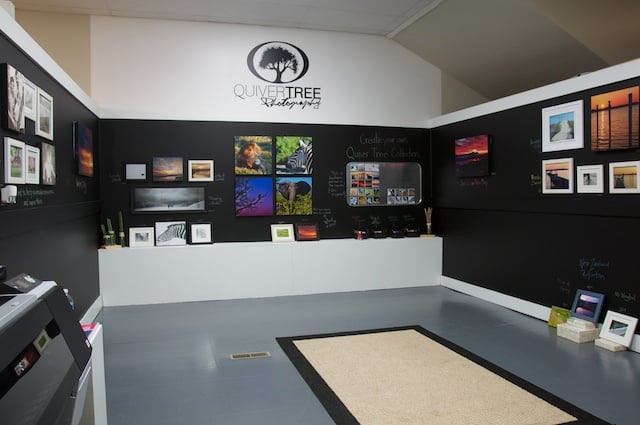
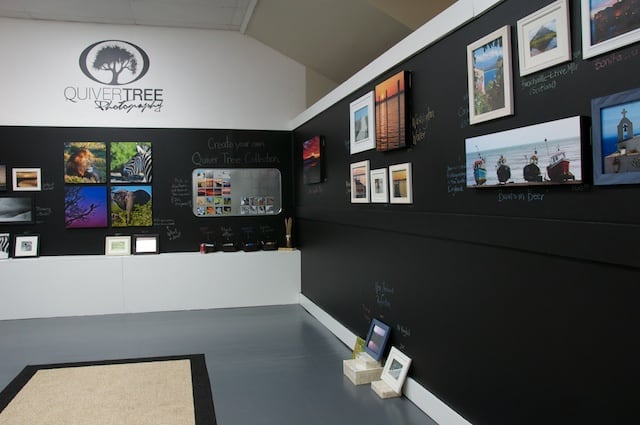
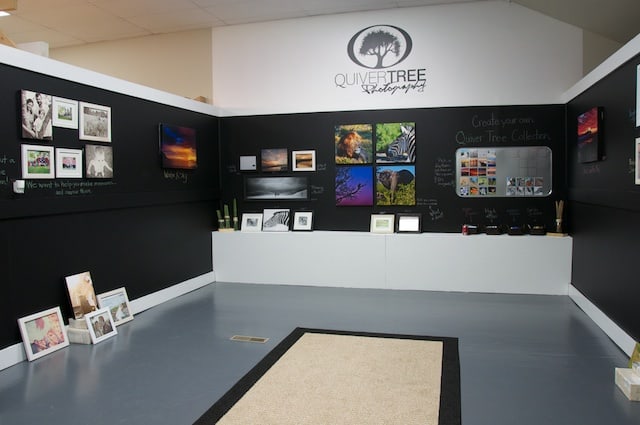
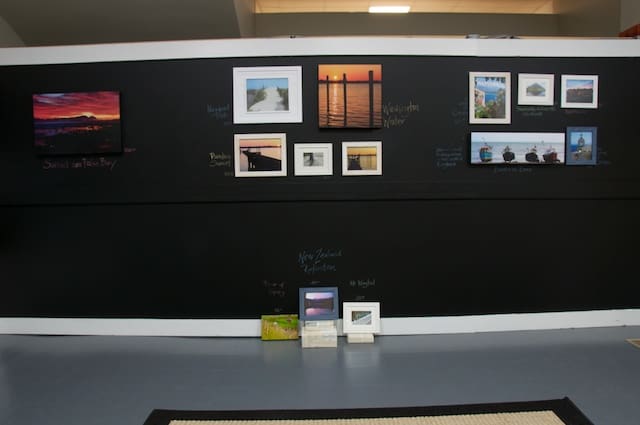
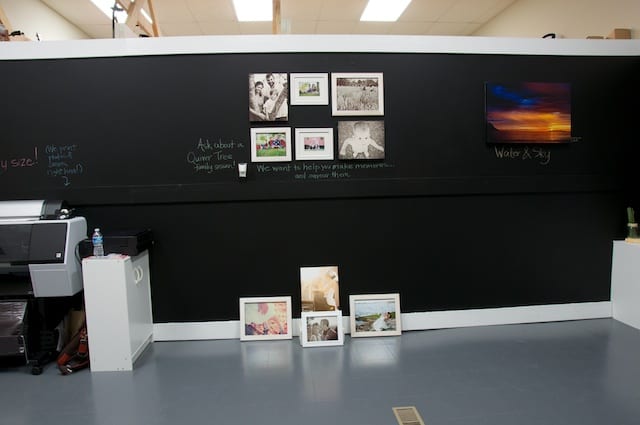
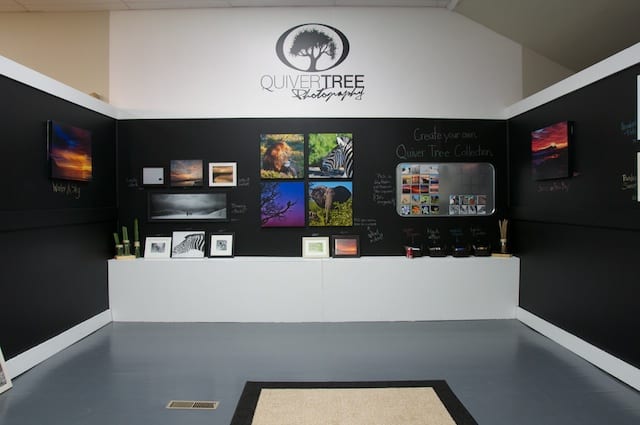
So, here’s a decent idea of what the space looks like. {Please ask questions in the comments if these pictures create questions in your head.}
This is the view if you’re walking in the left-hand door. (There are two doors into the space.)
At the moment, it’s a little bare in the middle (there’s a big storage desk the Hubs is busy building that will stand on that rug) and a little busy at the back, but I want some of those photos leaning against the wall on the bench to be hanging soon. But this is what we could do in the meantime, with printing issues, delivery issues, and limited time, and I think it worked out!
And this is the right side of the gallery, if you were standing at the right door, looking dead ahead. {And the boxes you might be able to see on the floor there are covered in old book paper.}
And that’s a view from the right corner…the printer is to the left of those photos on the far left, which isn’t very interesting. 🙂
That’s a good view of the North Wall.
And the South.
So that’s the tour of the Quiver Tree gallery space! I need to ask the Hubs to take some pictures of the Artisan Centre so you’ll get a feel for the bigger space we’re in. {You can check out the IBAC website here.} Â But that’s where things are right now… and I’m looking at these pictures and thinking about the heaps of things that I want to do…but now there’s no rush! Yay!
What do you think? I’d love to hear from you!
xCC

 I create resources to help people find deeper, more meaningful relationships with God through pursuing, pondering, and prayer. The "Shop" link above will take you to the home of many of the lovely resources I’ve created to help you keep walking one day deeper with Jesus.
The blackboard paint is such a marvelous idea, it also means that the gallery (and whatever hangs within) is this work in progress, this changeable thing and it makes it so much more approachable and personal. I think you did an absolutely fantastic job!
The shapes also work really well, creating these little islands of theme pics. Really, really love it!
I love it! I think the chalkboard looks great (clean, classy and lets the stunning photographs shine out) and is extremely practical. I love the non-iPhone too – looks cool but also brilliant that you can play around with combos actually on the wall. Awesome work you guys! I’m so excited for this God-given opportunity. He has been so faithful to you! xx
Yay! Looks beautiful! I look forward to coming by to see it!
Amazing! Eye catching room. Makes you want to take your time and look at everything in there, not just glance at it! Great work Mark and Caroline!
It looks fantastic, well done!!