Twas a Crafty Crafty Saturday
I mentioned getting crafty this past Saturday and promised pictures. Herewith, the promised fulfilled! As I’ve shared with you, I’ve been hoping to make our place feel more “homey” but we are living on a very tight budget, so I’ve been working on getting creative in making the place feel like home without spending anything. And the Lord blessed us with the wonderful photos of Asher to help! I’ve been inspired by a blogger called the Nester, and her trademark saying, It doesn’t have to be perfect to be beautiful.
The week before last we drove to a few different wood cutting places to see if they might have any off-cuts we could play around with and perhaps use to decorate the place. We came home with a bunch of totally random stuff. Different shapes and sizes, and wood types … a bedraggled lot they were. (It’s a word, look it up!) We thought for a while about different ideas of things to do with our random wood pile. Mark made a picture frame for me, but I think I want to paint it and will share the pictures when it’s done. We also painted a wee piece of wood and gave it some hooks to hang my aprons on which I forgot to take a picture of, so I’ll have to share that later, too. Sowwy!
In the meantime, I wanted to share a wallspace-taker-upper we came up with that makes me smile every time I walk past. We’ve yet to come up with a name for it so let me know if you have an idea. And remember the theme is It doesn’t have to be perfect to be beautiful before you start thinking it’s too rustic or college dorm-esque! We started with a pretty piece of (free!) wood which then received seven evenly placed nails by Hero Hubby. He drilled holes through it and we took a broken guitar string off my guitar (I have been lazy to change it because I haven’t been playing lately) to use as a wire hanger to attach my hanging ribbon to. Then I played around with photos, notecards, old birthday cards, ribbons and even Christmas ornaments to arrive at:
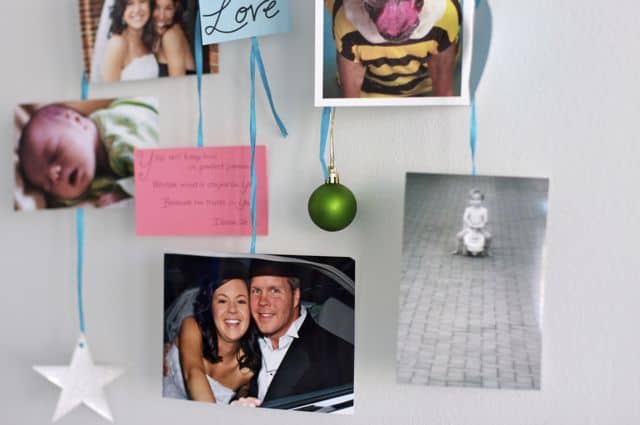
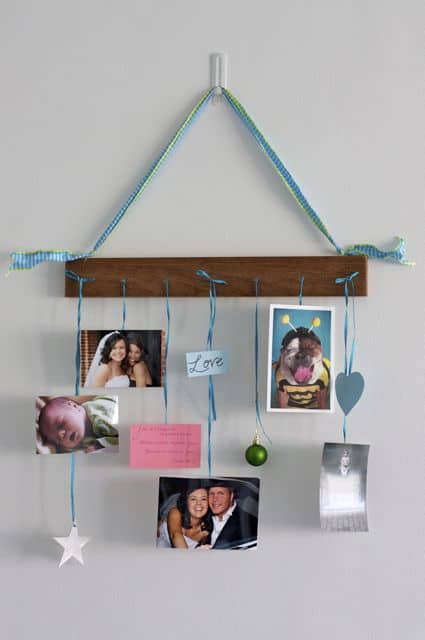 Tell me you love it even if you don’t! haha I love it and am so pleased to have a bit more of the tons of white wall space covered around here at the awesome cost of $0 and an enjoyable Saturday afternoon doing something fun together! What was that? You’d like a closer look? I thought you’d never ask!
I am really pleased with my nice hangingwallthingthatneedsaname. I was given that birthday card ages ago and just couldn’t let it go (thanks, BB!) The notecard is Isaiah 26:3 if you’re straining to figure it out. And the bottom right photo of Asher on his car is one of the ones they gave me at the grocery store for next to nothing. I already had the other photos printed out from ages ago.
Here’s the Beautiful Breakdown:
Wood: Free
Nails: Free
Photos: Next to free
Raffia String Stuff for Tying: Counts as free because it was already in the craft bucket.
Christmas Ornaments, Birthday Cards, Ribbon, etc.: Same story
Having some wall space covered with stuff that makes me smile: Priceless.
There’s more to share from our Crafty Crafty Saturday, and it’s on the way. In the meantime, I’d love feedback. Especially before we have guests over and they think I’m a fruit loop for hanging this on my wall! Tell the truth! 🙂


 I create resources to help people find deeper, more meaningful relationships with God through pursuing, pondering, and prayer. The "Shop" link above will take you to the home of many of the lovely resources I’ve created to help you keep walking one day deeper with Jesus.