Why moving back to the US has suddenly turned me slightly granola, I’m not really sure. Maybe it’s because I’m a little freaked out by how common cancer seems. Maybe it’s because I’m starting to discover that cutting a little processing out of the process can be both health-conscious and budget-conscious. Maybe it’s because I like trying new things and taking pictures. Perhaps it’s because I can still remember how much smaller the chicken breasts were in South Africa, and I just find the difference worrisome. Who knows.
But after hearing some rave reviews from friends and reading a few online, I decided to give making my own laundry detergent a try, just to see how difficult it was, and to see if it actually worked. I consistently read that you could save a significant amount of money by doing it yourself — and I sure do like that idea.
I found a bunch of recipes online that involved melting soap and mixing stuff and it all seemed like a lot of work. And I wasn’t really interested in adding a really time-consuming task to my chore list just to save a few bob. So when I found the recipe that I thought I’d already heard a bit about and it involved three ingredients and three simple steps, I jumped in as fast as I could get my Mom to watch the kids so I could go to Walmart alone and get the stuff. I pretend it’s a mini-vacation and stroll those aisles in a rather leisurely fashion.
These were the magical ingredients I needed, which I turned into a little image for you to pin on pinterest if you like. Even though I think I should’ve tweaked it a little more, I decided I was spending too much time on this and I promised a friend I’d share this recipe a gabillion years ago. Or three weeks, same diff.
{I was given a heap of Ivory soap when we arrived back in the States and my Dad’s church blessed us with a huge box of pantry-stuffers. Which was awesome and I might’ve forgotten to tell you about that. But being a Dove girl, I sat that Ivory aside, knowing it would serve a purpose in its own good time. This is that time. Also note: The Fels-Naptha Bar is AWESOME for stain treatment. I wet stains, scrub with that bar and a toothbrush and launder, and it has worked a LOT!}
Here are the Three Special Steps: {and if you are the parent of a kid who watches special agent Oso, you appreciated that wording}
1. Grate a whole bar of Ivory soap OR a half bar of Fels-Naptha into a big pot. {Not both!}
2. Let your kid feel special, by allowing him to pour in one cup of Borax and one cup of Washing(ton) Soda.
{That’s face paint from preschool, and this is a horrible picture because my Hubs is a photographer. And I am not. And I was using the wrong lens and standing in a chair… it’s a long story, okay?}
3. Stir like you mean it. Really. Stir and stir some more, until a nice powdery mixture results. This will all take less time than an episode of Little Einsteins.
{Yes, the Kool-aid spoon does handle a lot of work around here, and yes I do wash it throughly when switching between this job and making granola.}
And, drumroll please…that’s it! You just use 1 TBSP (yes, one lil’ ol’ tablespoon) for normal loads and 1 – 2 TBSP for heavily soiled loads. I have been pretty generous with it because I like the way it makes the clothes smell, but really, it works great and that’s all you need!
So far I’ve used this simple recipe for regular clothes and delicates, pretty soiled loads (Tigers and Bears, ya know) and smaller/shorter wash loads, and it has done very, very well. I occasionally stain treat with the Fels-Naptha bar (or good ol’ Shout) before washing.
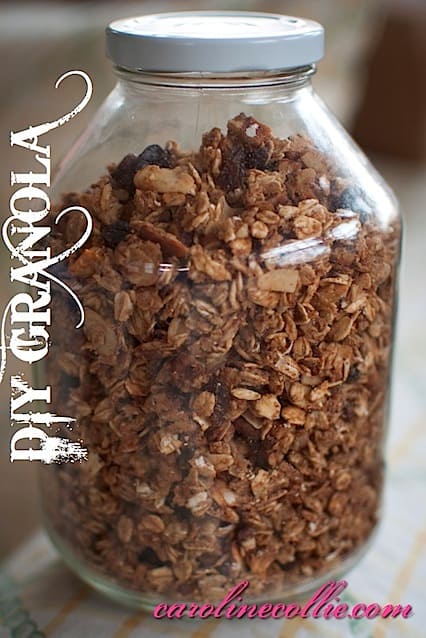
I keep it in an applesauce jar, like the granola. Just not the same jar.
I will probably make two batches next time, just to make the little mess a little less often.
But that’s the whole she-bang! Let me know if you try it. And if you want to see the original post where I found this recipe, which was awesome because they also did a cost breakdown analysis which takes the time to tell you just how much you’ll be saving if you decide to start making your own laundry detergent, you can click right here! You forgive me for not wanting to do all that math all over again myself right? The Little Einsteins are singing in my ears as I type…
Enjoy!
xCC
***
Some posts on my site contain affiliate links. When you click on those links to make purchases, I receive compensation at no extra cost to you. I love it when you do that! Thank you for supporting With Love!
Irecently read an article in the Wall Street Journal which talked about the growing cultural divide among classes in America. The author mentioned different levels of income, living in different locations, the likely presence or absence of religion, whether children in each group are likely to grow up with married parents or not. It was very interesting. The premise of the article was that this cultural divide is very problematic for the future of our country, but it will take grassroots efforts, not top-down legislation to bridge the gap and keep us United.
Care to guess the difference between the two groups which stuck out to me more than any other?
Statistics about single parenthood, unemployment, or crime?
‘Course not.
I was completely distracted by the comment that one group eats cereal and milk is not at all likely to eat yogurt and muesli for breakfast.
I was distracted because we eat yogurt and muesli for breakfast, and I hadn’t considered the fact that it’s kind of posh. I guess my foreign hubs has a bit of poshness about him, though I’d more accurately chalk it up to the cultural differences.
Among those differences is his preference, which I’ve inherited (although I still do oatmeal with peanut butter and honey some mornings) — for yogurt and muesli or granola en la mañana. I digress to ‘splain that the muesli we more commonly ate in the UK and SA differs from the granola we eat here because muesli generally consists of rolled oats that haven’t been cooked (they’ve been soaked usually), whereas the granola oats have spent some time in the oven.
Anywho.
This could bring us back to the not-so-posh side of posh, but I’ve been considering making my own granola since Apple became a publicly traded company. Okay, maybe just since before Tiger Tank could crawl.
Similar to the bread issue that kicked off my affinity for baking our bread myself, this adventure was birthed out of a desire to find a cost-effective and healthy alternative to the expensive granola on the shelves at the grocery store.
So I did some research, dragged my feet, went back and reread the recipes I’d already looked at, and dove in.
Here’s the scoop on how you can too. {Make the granola, not drag your feet, that is.}
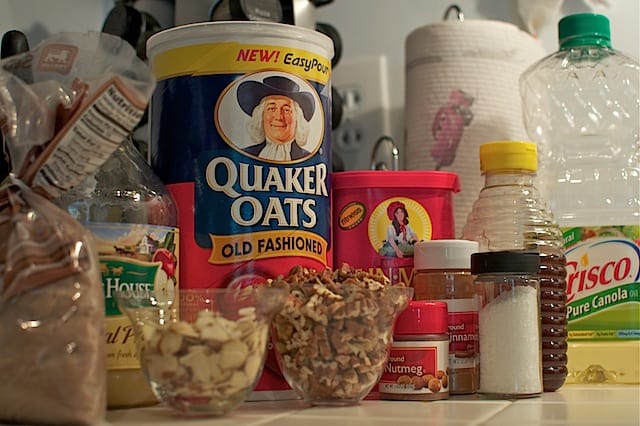
Start with this team of champions:
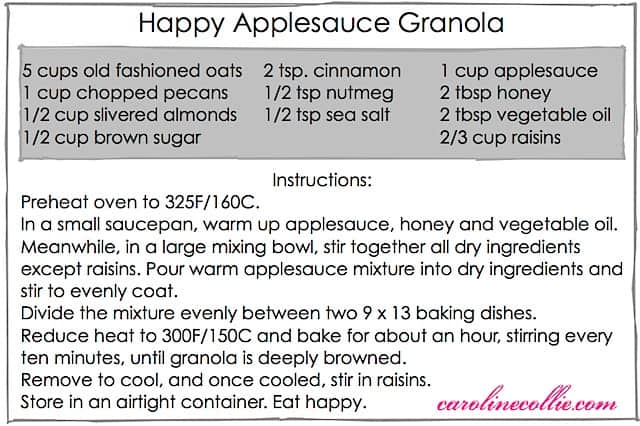
Old Fashioned Oats, Unsweetened Applesauce, Brown Sugar, Cinnamon, Nutmeg, Chopped Pecans, Sliced Almonds, Sea Salt, Honey, Vegetable Oil and Raisins.
Turns out making granola with applesauce is a much healthier choice than the traditional method that calls for lots of oil. Applesauce is so magical.
Preheat your oven to 325F/160C.
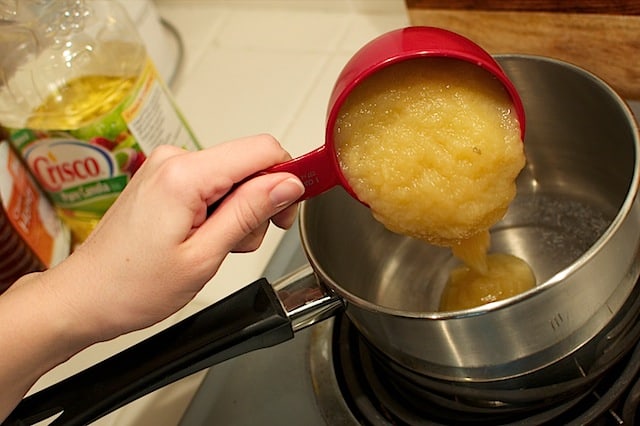
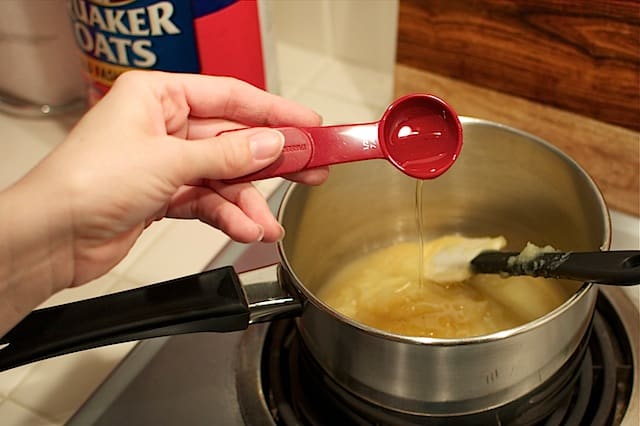
In a small saucepan, combine 1 cup applesauce,
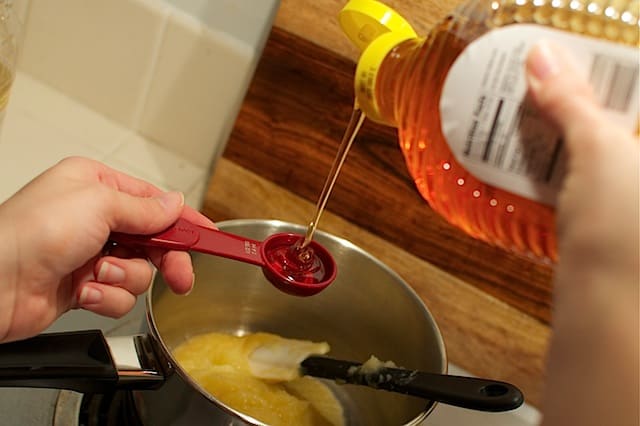
2 TBSP honey,
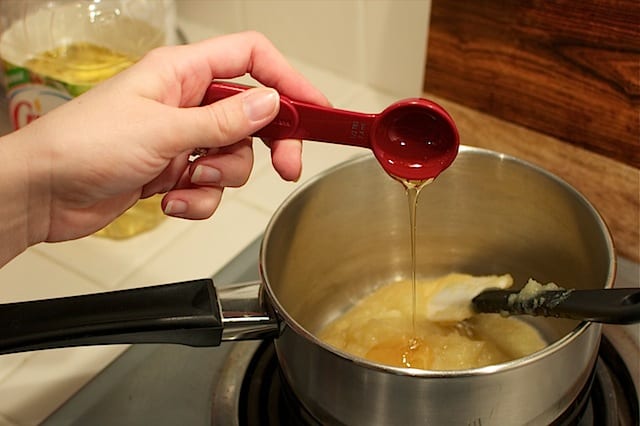
and 2 TBSP vegetable oil. This picture might still be honey. I can’t remember.
Oh wait, there’s the oil.
Warm gently over a low heat with an occasional stir. If you want to talk to the food while you’re at it, that’s up to you. I’m not here to judge.
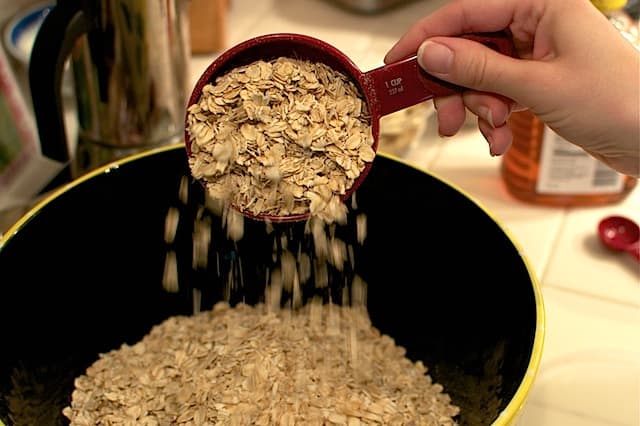
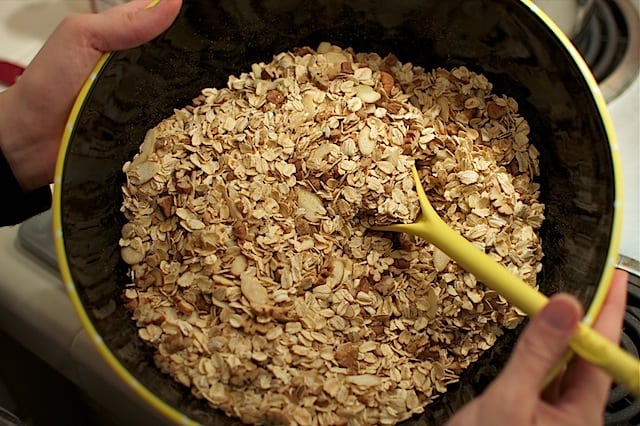
Meanwhile, stir together 5 cups old fashioned oats,
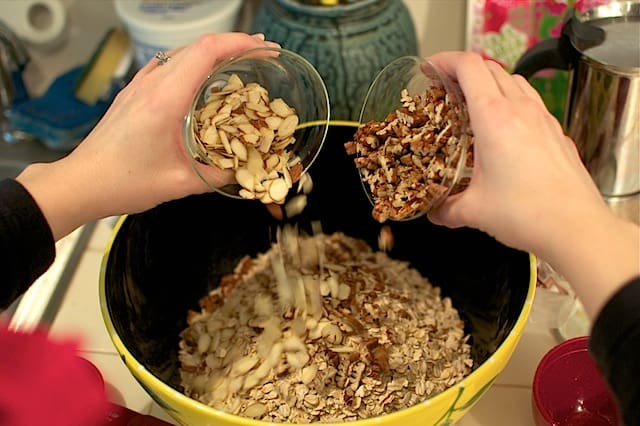
1/2 cup of slivered almonds and 1 cup chopped pecans…
Why, yes I always measure my nuts into pretty dishes when I’m cooking. It had nothing to do with the Hubs taking pictures.
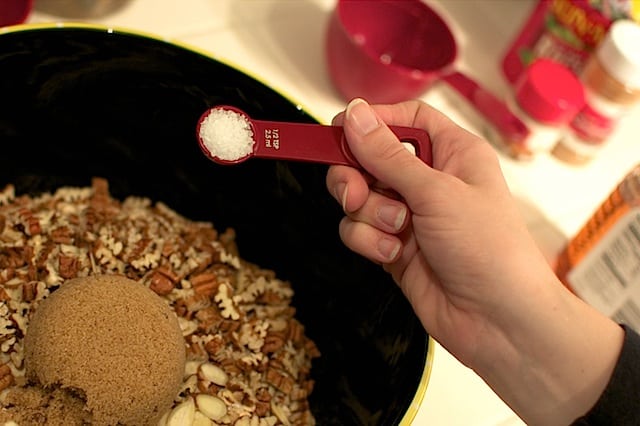
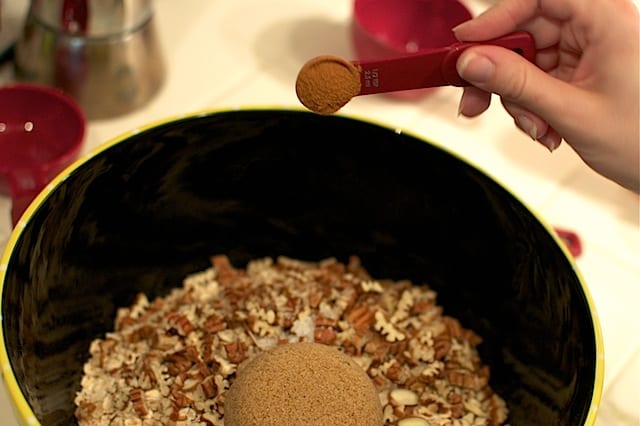
1/2 cup brown sugar…
{dump}
1/2 tsp of sea salt…
2 tsp. cinnamon and 1/2 tsp nutmeg.
{I’d like to note here that if you’re not a big fan of the taste of nutmeg you might want to scale it back to 1/4 tsp or skip it all together. Because we eat our granola with yogurt, it mellows it out to perfection for me.}
Stir to nicely combine.
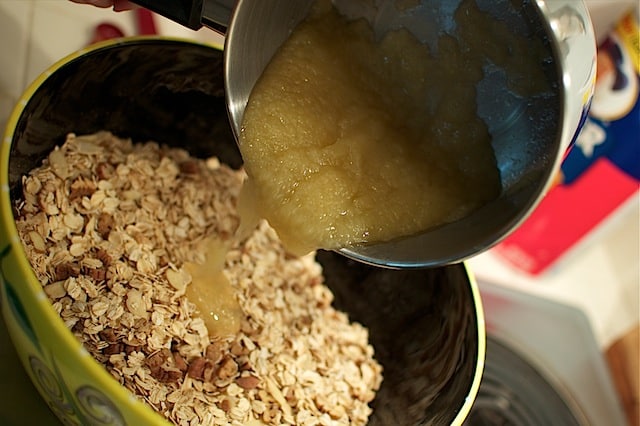
And then pour in the applesauce mixture which should be nice and warm by now.
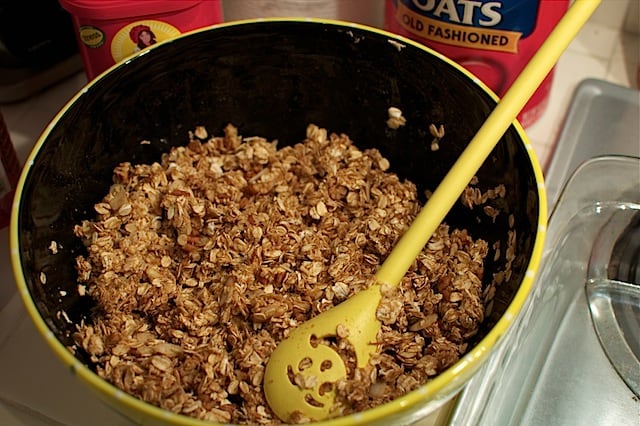
Stir till all the oats and pecans feel like they’ve had a chance to warm up in the mushy goodness.
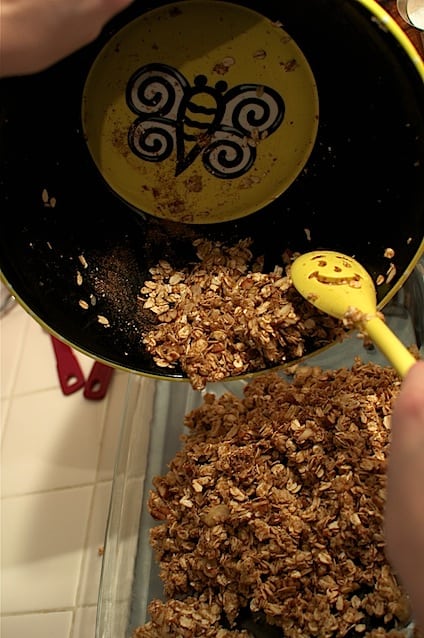
{Did I mention that if you haven’t moved into your aunt’s old home and inherited a smiley face spoon, you haven’t lived? Truth.}
Now evenly distribute the glorious contents of your mixing bowl into two 9 x 13 dishes.
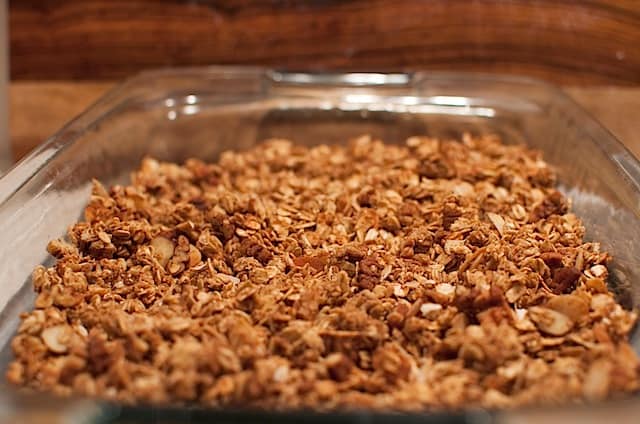
Turn the oven down to 300F/150C and bung them into the oven (that’s how my mother-in-love says it) for about an hour, stirring every 10 minutes, until the granola is a deep brown. (I just think the hot preheat seems to help with my browning. I might just have a lazy oven.)
When you think it looks good, remove it to cool and boo-yow! The breakfast of my champions! It will get a little crunchier as it cools, but if you like yours good ‘n crunchay let it go a little longer. I keep mine on the softer side for the sake of the little teeth that also like to munch it.
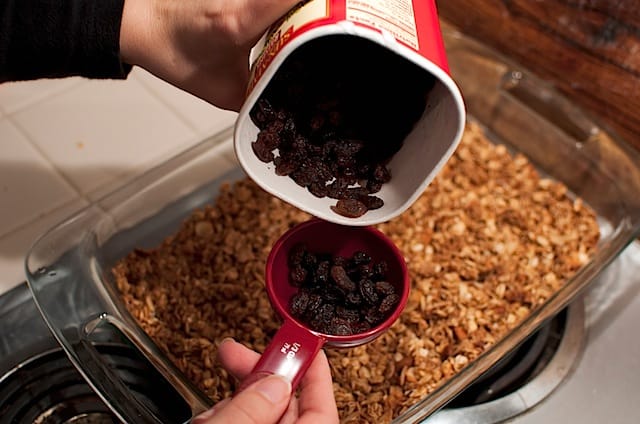
Once it has cooled, stir in 2/3 cup of raisins.
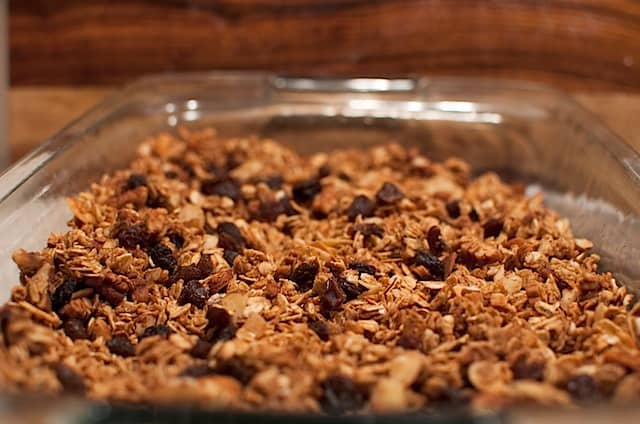
Bask in the glorious goodness. And pat yourself on the back. Or whatever you do to celebrate.
This recipe makes about 8 cups. I like to store it in a cleaned out applesauce jar.
Posh, no?
You can easily halve this recipe to see whether or not you like it before going all out. I think this lasts about a week around these parts. Feel free to add 1/2 or 1 cup sunflower kernels, or other nuts. I was just wasn’t feeling the kernels this time. Sorry guys, maybe next time.
I created a printable recipe card for you. Because I love you. And have fun with creating things in Pages.
Let me know if you decide to try it, and how it goes! I borrowed heavily from Drea Wood’s Granola and Fake Ginger’s while finding my own thang. They’ll help you halve the ingredients if you don’t want a bunch like I did. But for all that work, why not make a bunch? 🙂
After we took down the Christmas decorations, I’ll be honest with you, I was more than a little bummed. We’ve been blessed with a place to live that’s fully furnished, which is absolutely amazing (and can you think of a better scenario for folks coming off the mission field who need to save up to buy a place of their own?). But the Christmas decorations made being in someone else’s already-decorated place feel a lot more like our home, and warm and home-y.
But by mid-January, it really was time to take things down. So then I thought adding a little pre-emptive Valentine’s flair might warm things up again, in preparation for spring when maybe I’ll find something else to pull out and our stuff will hopefully arrive and I can at least throw a few picture frames I bought on the side of the road in Gordon’s Bay onto the wall and say “Look, that’s me and the Bear and the Eiffel Tower!”
Okay, the Bear and I.
It took me so long to get around to completing those Valentinish crafts that they’re actually perfectly timed for the actually holiday. So there ya go.
I thought I’d share a few sweet little heart ideas in case you’re feeling crafty and want to spruce up for absolutely no reason. Although Saint Valentine, legend has it, was a very brave and important believer — but that’s a story for another post.
Now I’ll warn you, if you’re going to be offended that I am about to tear up a terribly old book that is moldy and water damaged and actually needs to be thrown out just to make some paper hearts, look away. Click over to an old post or something. It’s gonna happen.
I ripped some pages out of an old book and began cutting and playing around with hearts of different shapes and sizes.
I layered some different colored hearts with the book page ones and glued them together and stuck them on yarn and took pictures which will not upload but it didn’t look that good anyway.
I then pulled the hearts off the yarn and threaded several through a single piece of thread I’d doubled over. In case you’re like me and need more instructions:
Poke holes in your hearts.
Pull yourself a long piece of thread, double it over and tie both ends of it in a knot around the needle.
Thread it through the hole in a heart from back to front, then loop it up and back through the hole a second time. Make sure to go in between the two pieces of thread the second time, or else you’ll just be undoing what you just did. (If that doesn’t make sense just try it and you’ll see what I mean.)
Leave enough space to place the next heart where you want it, and follow the same procedure.
Shampoo, rinse, repeat and voila!
1. Le Dangly Garland
A lil sum fin sweet like this will emerge which you can hang from that naked hook on the mantle, or a doorknob. Keep out of reach of Tanks.
I also decided to make a heart garland, just with book paper, which seems romantic and the end result could possibly be used not just at Valentines maywhobiddyhaps.
I folded over a sheet of book paper and cut around a heart I’d already traced, but left a little of the fold un-cut at the top of each of the heart’s humps. Like so.
And then I used a long piece of thread and placed my sweet hearts gently over side by side, and with a little dab of glue, I pinched them closed and voila! Aren’t we feeling French today?
I think this’ll be cute in our bedroom later. The Bear likes it.
And oh yes I did repurpose the sweet little polka-dots of a Krispy Kreme box.
A couple of cut-out hearts glued together with a string of yarn in between…happy on a door knob or a fridge handle but keep out of reach of Tanks!
3. La fête du Krispy Kreme
One last little crafty idea for some hometastic Valentine goodness: Grab one of those old book paper hearts you’ve already cut out. (I think newspaper would work just as nicely by the way. Feel free to soak it in some tea and let it dry to stain it if you really want a vintage feel.)
Starting at the bottom, cut following the edge of the heart about 1/8th of an inch in, just tracing along the shape of the heart inwards, gently and carefully for as long as you can go, around and around toward the centre.
You can glue it gently to a happy colored piece of craft paper and…
The result should be something like this, which will make a lovely Valentine for the Hubs next week, and I’ll be proud.
4. L’amour du Papier (Love of Paper)
I just thought those were a few fun ideas worth sharing. Let me know if you try one! Do you decorate for Valentine’s Day?
A few weeks ago I mentioned that I’d been working on finger knitting, and it was a fun little crafty project that was super cheap and made me feel like I’d accomplished something. I’d seen a scarf at Kohl’s for like $20 but didn’t want to pay $20 for a scarf even though I really liked it. So when I got the idea to do something different (via an instragram by the Nester and a tutorial by Gussy Sews) I was excited to go in a different direction.
Now, if you’re anything like me, you love bacon, dislike cleaning, and sometimes tend to make things more complicated than they already are.
I’m not the only one? Good.
So I read through this Gussy tutorial which said this would probably take me about ten minutes to figure out. I followed the instructions and studied the pictures, but still something didn’t seem quite right.
I managed to stay calm and never said anything like I’ve got half a PhD, surely I can finger knit a dang scarf! Look at all these kids doing it on youtube! What the heck is my problem?
You can decide whether or not you believe me.
But eventually I realized seeing it in action would probably help a lot more. I’m better at watching than listening, I admit it.
So I found this other tutorial on youtube, which varied slightly in instruction. You start out at your pinky with Gussy, at your pointer with this other gal, (I might have that backwards) but everything else is basically the same.
Being the persnickety gal that I am, I also discovered that if I didn’t push the string all the way down my fingers each time — if I only pushed it down about halfway — the weave would look tighter and a little less sloppy. And that made me happy.
This is the youtube video:
And here’s the final product:
Â
I love gray these days.
I made a couple of necklaces like Gussy’s to figure it out, and then I knitted and knitted and knitted to make a super long scarf and then tied the beginning to the end. I wanted to be able to loop it over my head seven or eight times to stack it up, because I wanted it to be poofy. And maybe diminish my double chin, by association.
Since I was writing this out for you I thought I should maybe measure it to see how long it is, just so I could tell you. And then I laughed. The reason I can wrap this thing around seven or eight times is because it’s 23 feet long.
Yes, 23 feet. 7ish metres for my peeps who’re rocking the metric system.
But I did it in a few hours — maybe four hours, one evening. While watching Elf.
Please let me know if you decide to try it. Total cost for the project? An evening of my time, ten minutes of the Hubs’ time before he said he wouldn’t help me figure it out, and about $1’s worth of yarn from Walmart. I bought the locally made in Washington, North Kakalaki yarn even though it was a dollar more. Worth it.
In closing, do you like my scarf, do you think I’m a nerd and want to send me $20 to get the one at Kohls? 😉
Hi e’dybody (as the Bear would say), my friend Eve is sharing a wonderful Whole Foods Holiday guest post today! She is super. I’ve made you wait long enough for this edition of the Whole Foods Holiday posts…so without further ado…
Born Up a Tree!
***
Food for Thought
When I was pregnant the first time, I have to admit that I didn’t eat very well. Maybe I should say that I ate really well, but I just didn’t make good choices about what I ate. I gained 50 pounds and had a 6 pound 13 ounce baby. I nursed my bundle of joy and when it came time to feed him solid food, a light came on for me. Would I feed him the same things I had been eating? Um, NO.
I tediously made all of his baby food- it was easy by the way. Recipes are easy to find and as long as you have a food processor and a freezer, you are good to go. Since I am a full time mom and have a full time job, it took a lot of planning and a lot of cooking on the weekends. Out of desperation one evening because of a busy weekend, I stopped at the store and picked up some baby food in jars. All I had to do was open them, take a whiff, and I knew that I was not feeding that to my child.
As my son grew, I realized he was an extremely picky eater. I am blessed that my son is not allergic to any foods, and we do not have any behavioral or developmental issues that require special diets. I know lots of people who have to put lots of love and care into meals because of special dietary needs- and I admire you. But he is still a picky eater, which also requires love, care, and patience with every meal.
Since I do have to balance my workload with my mother load, my son goes to a great Christian pre-school/day care that I dearly love. They feed him, but it is certainly not what I would feed him at home. At home we eat as many whole foods as possible- potatoes (usually sweet), rice, whole grains, whole fresh or frozen veggies, whole fruit, and whole meats.
And when I say whole, I simply mean not processed and with no added ingredients. If I buy something that has a label, I make sure that there is nothing on there that I can not pronounce or anything artificial. I firmly believe that this whole food is what my Creator created me to eat. I can’t afford to purchase all organic foods. So I do the best I can with what is available in my rural community. Fortunately, there are lots of natural and non-processed options to choose from.
It takes some creativity to not eat the same thing every day. Especially with a picky four year old. We have some favorites that we rotate through that my child loves to eat and I feel good about feeding him.
One favorite is something we call Chocolate Cookies, for lack of a better term. The ingredients are simple- and you can use organic or conventional products.
½ cup milled flax seed (in the baking aisle near the flour)
½ cup wheat germ (near the cereal)
½ cup honey
½ cup peanut butter
about 1 cup HOT water (hot as you can get it from the tap)
Optional: for a little extra protein boost, add 1 tsp Spirulina Powder, available at health food stores)
Mix all the ingredients except the honey, peanut butter, and water until well blended.
Add the honey, peanut butter, and water (a little at the time), and stir until the “batter†is the consistency of mashed potatoes, with everything mixed well.
On wax paper, pat the cookies out by hand into patties about the size of a small hamburger.
Using wax paper between the cookies, store in an airtight container in the fridge for at least 6 hours before you eat them- they will firm up.
This recipe makes about 8 cookies and will keep for a week or more in the fridge, but at my house I have to make them twice a week.
Don’t be fooled by the appearance- they do NOT taste like the no-bake-oatmeal-peanut butter-sugar-cookies that you may remember from your childhood. The texture and flavor is very earthy, due to the flax seed and wheat germ. My son has eaten these since he was old enough to hold them in his hand. You can tell by the pictures that he enjoys eating them, but they are a little messy. He loves them for breakfast, and sometimes for a quick snack.
If you would like some more ideas on how to add more whole foods to your families meals, I will be happy to share. Send me an email at ehhoneyc@gmail.com.
***
Thanks so much for sharing with us, Eve! That was definitely some good food for thought for me — and I’m hoping to make “Chocolate Cookies” with the Bear soon!
We might have one or two more Whole Foods Holiday posts on the way, but in the meantime, do you have something to share? Just add a link to the link below if you have a Whole Foods Post or Recipe somewhere else on the net that you’d like to share!
Hi gang! If you’re just joining us, we’re doing a little series ’round these parts that I like to call Have a Whole Foods Holiday. I think it’s catchy. Even if it’s not, someone pointed out to me the obvious truth I hadn’t thought of (I’m tired and in the middle of a move, ya know) that this is the time of year when we consume the greatest quantities of sugary, processed, unhealthy stuff we’ll pass through our lips all year.
I’m not declaring an all-out war on all things processed, mind you — and pass the sweet potato fluff — but I am aiming to take one step at a time, to implement gradual changes that will result in more whole, healthy stuff arriving at the Collie Clan’s dinner table.
{Christmas 2010’s Health Food: Two Months Prior to Baby Bro’s Arrival!}
Today my friend Laura Anne (who you may have met round these parts before) is sharing some simple tips that will help you steer your food wagon in the direction of healthier choices.
Born up a tree!
***
So, I was so pleased when Caroline wrote this post. One of the things that shocked both my Mum and I is a recipe book a lovely person gave to her when she was visiting her best friend who currently lives in the USA. Every single recipe involved concentrated tinned (canned) soup. I won’t lie to you – I was horrified.
While at university, I studied Health Promotion. My eating and cooking habits changed dramatically while studying Health Sciences. So did my peers’. It did make my food bill a little bit more expensive, but I think it was worth it. It was also amusing to watch as the snickers bars and packets of crisps (potato chips) we brought as a snack at the beginning of year slowly disappeared, and bags of nuts, dried fruit, bananas, satsumas and apples replaced them. It was almost a silent competition to see who could bring in the healthiest snacks and lunches!
Here are my top tips for making your diet more healthy. These are (hopefully) simple things you can do to help you make meals a little healthier, but still enjoyable!”
Steam rather than boil. Not only does it give you a little more space on the hob, [US translation: stove] again, steam keeps more the taste and nutrients in your veggies! If you don’t have a steamer, you can do this pretty easily by rinsing your veg, putting the teeniest bit of water in the bottom of a bowl, covering it up and popping it in the microwave for a few minutes. The more veggies you have, the longer it takes to steam. 🙂
Grill rather than fry. Much less fat involved! Oh, and try to use poultry over your red meat too. Turkey mince is a great alternative to beef mince (ground meat).
You do actually need fat in your diet, but some fats are much better for you than others. Monounsaturated fats are the ones you want to pick over the saturated and polyunsaturated. If you can’t be bothered checking labels – olive or rapeseed oil based products are a good way to go. Unless you are allergic or something! Avoid hydrogenated fats like the plague.
Sometimes you need to use those woks and frying pans. Invest in an oil sprayer. No. I do not mean the ‘5 cal olive oil spray’ you see in the supermarket. That stuff is full of other rubbish that will mess with your digestive system. Buy an oil sprayer you can fill yourself with olive oil, and use it to spray your frying pan/wok to say goodbye to ‘whoops more came out than I planned’ moments that led to oily greasy dinners.
Water down your fruit juice. Fresh fruit juice is the best, but is full of sugars. Watering it down means you drink the same amount of fluid but it’s a bit better for your teeth, and it means the juice will last longer. You’ll soon find that drinking juice ‘straight’ will seem really strong to you!
Ask yourself this question: do I really need to add salt to this? The current RDA (recommended daily amount) of salt is 3-6 g for an adult, 2-5g salt for a child, 1g for a baby under 1 year old. Do you know that your average can of soup probably has 1-2g of salt in it? Start looking at labels for the sodium content, and I promise you’ll be shocked as you begin to realise how much salt you can consume in a day without even adding it to your crock pot. Buy reduced sodium salt, and try to avoid cooking with it – use herbs and spices to flavour instead when you can.
Avoid the ‘diet’ drinks and food. Sweeteners and the stuff they put into ‘diet’ products really screw up your digestive system. If you really want that can of coca cola, go for the ‘full fat’ version rather than the diet one. Why? See here for just one article on why diet soda is so badly named. I can testify to this one, because my appetite went NUTS last summer when I was taking lucozade sport when I was cycling.
Sugars. A similar thing to salt, you’d be shocked how much sugar is already in what you eat. I’m a sugar addict. I love fruit, I love chocolate, I love baking cake and eating it. For this one, let me refer you over to Bethany Hamilton. I now try to bake using honey rather than refined sugar, or using unrefined sugar.
You still need carbohydrates. Your kids especially need those carbs. But again, for us adults, moderation is key. Also, you’ll find eating complex carbohydrates (e.g. wholegrain bread over white bread) is much better and can actually help combat sugar cravings.
I love cheese. I use it a lot while cooking these days, since I can’t eat red meat anymore, and have become an almost vegetarian. However, it is pretty fattening. So, if you can use more mature cheddar or other hard mature cheeses you can use less cheese in your cooking for the simple fact a mature cheese has a much stronger flavour. As for milk, semi-skimmed has same calcium content as the full-fat stuff. So use a more skimmed milk for less fat in your meals! (Kids under 2 need the full-fat for growing though!)
And an extra bonus tip: Eat seasonally. It’s amazing how much cheaper you’ll find it if you do. Have you seen the difference in the price of a punnet of cherries in July compared to in November? 🙂
***
Thank you so much for sharing your wisdom with us, Laura Anne! You just answered a couple of food question marks for me!
Hope you all enjoyed it! Have an extra tip to add to the list? Please leave it in the comments!
I create resources to help people find deeper, more meaningful relationships with God through pursuing, pondering, and prayer. The "Shop" link above will take you to the home of many of the lovely resources I’ve created to help you keep walking one day deeper with Jesus.


 I create resources to help people find deeper, more meaningful relationships with God through pursuing, pondering, and prayer. The "Shop" link above will take you to the home of many of the lovely resources I’ve created to help you keep walking one day deeper with Jesus.